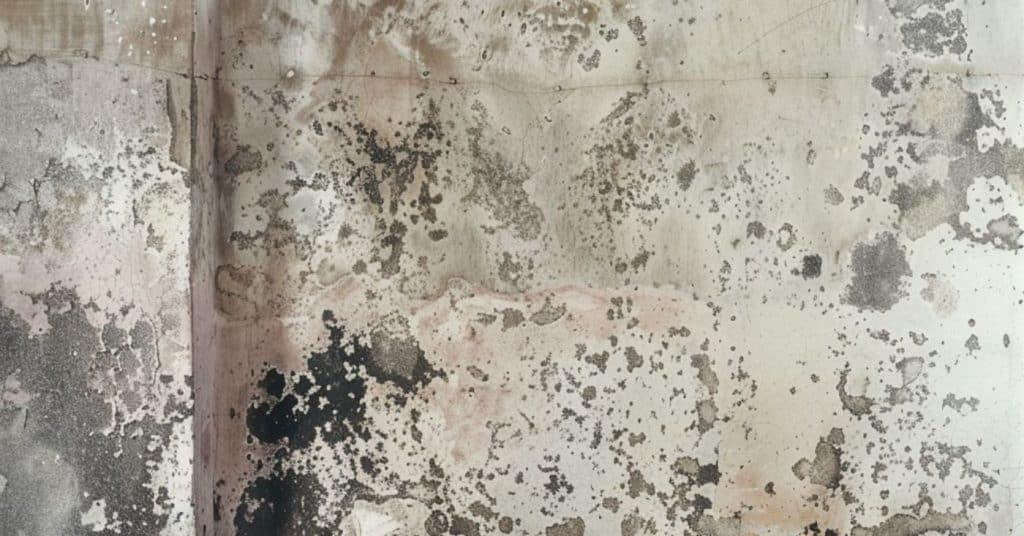
Mould on walls is more than just an eyesore; it’s a health hazard and a silent destroyer of our homes. Many of us grapple with this persistent issue, especially in humid climates, where it seems almost impossible to keep our walls clean and mould-free. But what if we told you that there’s a way to not only remove mould but prevent it from making an unwelcome return?
In this article, we’ll delve into the causes of mould growth and unveil effective strategies to ensure your living spaces remain pristine and healthy.
Understanding the root causes of mould, from excess moisture to poor ventilation, is the first step towards a lasting solution. We’re here to guide you through identifying these issues and implementing practical measures to tackle mould head-on.
By addressing the problem at its source and adopting a proactive approach to maintenance, we’re confident you can maintain a mould-free environment. Let’s explore how to remove mold from walls and breathe easier in a cleaner, healthier home.
Understanding Mould on Walls
Mould is a tenacious adversary that clings to walls, posing both aesthetic and health challenges. Let’s dive deeper into what sparks its growth and why it’s a concern.
What Causes Mould?
Mould flourishes in damp, poorly ventilated areas where humidity levels are high. Common culprits include leaking pipes hidden within walls and condensation that forms when warm, moist air meets cooler surfaces. It loves lurking in the shadows, out of sight, waiting for the right moment to spread. Ensuring rooms are well-aired and fixing leaks promptly goes a long way in keeping mould at bay.
Health Risks of Mould Exposure
Exposure to mould can be bad news for your health. It triggers allergies, causes respiratory problems, and can even aggravate asthma in sensitive individuals.
Think of it as an uninvited guest that overstay its welcome, affecting the air quality and, by extension, your wellbeing. Combatting mould is crucial for maintaining a healthy living environment. We encourage staying vigilant and taking swift action at the first sign of its presence.
Preparing for Mould Removal
Removing mould correctly starts with the right preparation. We make this step easy to follow, ensuring the process is both effective and safe.
Safety Precautions and Protective Gear
Safety comes first in our book. Before tackling mould, gear up with goggles, long rubber gloves, and a mask that covers both nose and mouth. This equipment prevents direct contact with harmful mould spores.
Keep the area well-ventilated; open windows to promote airflow and prevent spore spread to other parts of the house. Simple, yet crucial, these steps form a barrier between you and potential health risks.
Assessing the Extent of Mould Infestation
Determining the scale of mould invasion is key. Examine the affected area closely—if the mould covers more than about ten square feet, consider calling in a professional.
For smaller areas, getting rid of the mould is manageable with the right approach. Pay attention to hidden spots and areas prone to dampness, as mould loves sneaky places. By accurately gauging the infestation, we ensure treatment is comprehensive, leaving no spore behind.
Materials and Tools Needed for Mould Removal
Removing mould from walls requires not only the right technique but also the correct materials and tools. Let’s dive into what you’ll need to tackle this task effectively.
Natural vs. Chemical Cleaning Agents
Choosing between natural and chemical cleaning agents is a pivotal step in the mould removal process. Natural solutions, such as vinegar or baking soda, offer a safer alternative for those of us keen on minimizing our exposure to harsh chemicals. A mix of water and vinegar, applied with a spray bottle, can act as a potent agent against mould.
On the flip side, for severe mould infestations, chemical agents like bleach or specialized mould removers pack a heavier punch. These potent formulas, when applied carefully following the manufacturer’s directions, can eradicate mould more thoroughly in certain situations.
Remember, the choice between natural and chemical options hinges on the severity of the mould problem and personal preference regarding chemical use in the home. Safety should always be a top priority, so ensure ample ventilation and wear protective gear, regardless of the cleaning agent selected.
Mould Removal Process
Removing mould from walls requires careful steps to safeguard health and maintain the integrity of the home. Let’s dive into the process.
Step 1: Ventilate the Area
Before tackling the mould, open windows to allow fresh air in. Keep doors closed to prevent spores from traveling through the house. This simple action sets the stage for a safer cleaning environment.
Step 2: Cleaning Mould Off Painted and Plaster Walls
Mix water with a mild detergent, or opt for a dedicated mould cleaner for a more thorough cleanse. Use a damp cloth to gently wipe the mould away from painted and plaster walls. Avoid scrubbing too hard to prevent paint or plaster damage. This method ensures the mould says goodbye without taking your wall coatings with it.
Step 3: Cleaning Mould Off Plasterboard Walls
Plasterboard walls demand a gentler touch due to their porous nature. Apply a mould-killing solution—tea tree oil mixed with water works wonders—then lightly dab the affected area. Rinsing isn’t necessary; just let the solution do its battle against the mould unseen.
Step 4: Drying the Walls Thoroughly
After the mould is history, ensuring the walls are bone dry is crucial. Use a dry, clean cloth to pat down the surfaces. If humidity is a notorious guest in your home, consider running a dehumidifier to pull out any lurking moisture. This step is like giving your walls a nice, warm blanket after a rainy day.
Remember, patience and gentle methods are your best friends in the mould removal journey. A dash of humor can also make the unwelcomed task of mould cleaning a bit more bearable.
Tips for Effective Mould Removal
Removing mould from walls requires careful planning and execution. Our aim is to provide practical advice that helps you tackle this issue with confidence.
Using Natural Remedies Like Vinegar and Baking Soda
Vinegar, a mild acid, becomes a mould-fighting superhero in our toolkit. Spray undiluted white vinegar onto the affected area, let it sit for an hour, then wipe clean with water and dry thoroughly. (*) (*)
You can also use vinegar to get rid of mold on ceiling. For tougher jobs, baking soda comes to the rescue. Mix it with water to form a paste, apply to the mould, then scrub gently with a brush. This duo not only cleans but also deodorizes, leaving behind a fresher space.
When to Use Bleach for Mould Removal
Bleach steps onto the scene for stubborn mould on non-porous surfaces. Remember, it’s aggressive and may well discolor fabrics, so think twice before using it on that heirloom rug!
Apply a solution of one part bleach to 10 parts water and let it sit for a moment before rinsing. After the battle, ventilate the area well and dry it to prevent mould’s return. Use bleach as a last resort, considering its harsh nature on both our lungs and the environment.
Troubleshooting Common Mould Removal Issues
Sometimes, despite your best efforts, mould clings on, refusing to leave your walls pristine. No need to fret—we’ve got the solutions to tackle these pesky problems.
Dealing With Stubborn Mould Stains
Stubborn mould stains are like that guest who overstays their welcome. They make themselves comfortable on your walls, and no matter what you do, they just won’t leave. The trick here is persistence and choosing the right weapon. For these tough stains, a mixture of bleach and water can be your best friend, but remember, ventilation is key.
Apply the solution directly to the stain and let it work its magic for at least 15 minutes before scrubbing. Repeat if necessary, and always wear protective gear to avoid any health hazards. Sometimes, these stains may well not disappear completely, but their impact significantly lessens, making your walls look way better.
Handling Mould on Porous Surfaces
Porous surfaces are like sponges—they soak up everything, including mould, which makes the challenge even greater. For materials like wood or drywall, you may well need to move past surface treatments. Start with a gentle cleaner, like vinegar or hydrogen peroxide, to avoid further damage to the material.
If the mould has deeply penetrated, consider removing and replacing the affected section. It sounds drastic, but it guarantees the mould won’t return from the depths to haunt your walls. Prevention is crucial here, so keep an eye on humidity levels and ensure good ventilation to stop mould before it starts.
Remember, tackling mould is not just about brute force; it’s about smart, strategic steps to reclaim your space from unwelcome invaders.
Preventing Mould Regrowth
After tackling the tedious task of mould removal, our focus shifts to stopping it from making an unwelcome return. By addressing the conditions that favor mould growth, we can maintain healthier, cleaner living spaces.
Improving Ventilation and Airflow
Maximize fresh air circulation in your home by keeping windows open on clear, sunny days. This simple act can significantly lower moisture levels, creating an environment less hospitable to mould.
For areas where windows cannot be left open or lack sufficient natural airflow, installing exhaust fans, especially in the kitchen and bathroom, plays a crucial role. Ensure these fans vent to the outdoors to effectively transport moisture outside of your home, not just into the attic or between walls where problems can worsen.
Controlling Humidity and Dampness in Your Home
Keeping indoor humidity under control is key in the battle against mould. Aim to maintain humidity levels between 30% and 50%. This is achievable through the use of dehumidifiers in damp areas and air conditioners during humid seasons.
Additionally, fixing leaks in the roof, walls, and plumbing promptly avoids water accumulation that mould spores thrive on. Simple changes, like moving plants outside or limiting their number indoors, can also reduce moisture in the air, further deterring mould growth.
Regular Cleaning and Maintenance Tips
Regular cleaning and deep cleaning go a long way in preventing mould regrowth. Wipe down surfaces, especially in the bathroom and kitchen, to keep them dry and reduce the chance of mould settling in.
Vacuuming with a HEPA filter captures mould spores from the air and surfaces, reducing the overall spore count in your home. Lastly, keep an eye on areas prone to dampness or water accumulation, tackling any issues immediately before mould has a chance to flourish.
By adhering to these strategies, we can create and sustain mould-resistant environments in our homes. The key lies in proactive prevention—keeping homes well-ventilated, humidity-controlled, and regularly cleaned. Let’s keep our spaces fresh, dry, and, most importantly, mould-free.
When to Call a Professional
Sometimes, despite our best efforts, mould on walls demands an expert touch. Recognizing the tipping point between a DIY clean-up and the need for professional intervention can save both time and the integrity of your home.
Signs That You Need Professional Mould Remediation
Spotting mould, especially in hard-to-reach areas or if it spreads over more than a small patch, signals a deeper issue. Here are a few indicators pointing to the phone-a-pro option:
- Extent of Infestation: If mould occupies a space larger than ten square feet, consider expert assistance. This size suggests the infestation is not superficial and could be rooted deeply within walls or under floors.
- Health Reactions: Experiencing allergic reactions or breathing difficulties while at home? Mould spores may well be at a level that requires more than a surface clean. Safety first, always.
- Recurrent Mould: Fights off mould only for it to return with a vengeance? This resilience often means moisture sources—like leaks or condensation—are not fully addressed. Professionals tackle not just the mould, but its cause.
- Black Mould Presence: Spotting black mould, known for its toxicity, demands immediate professional attention. Don’t mess around with this one; it’s a health hazard.
In these scenarios, professionals offer more than just mould removal services. They bring peace of mind, ensuring that mould says goodbye for good, without overstaying its welcome. Our homes are our havens; keeping them mould-free is crucial for both our comfort and well-being. Remember, tackling mould head-on, with the right support when needed, keeps the air clean and the walls pristine.